The Waterproofing Challenge
Mangalore tiles remain one of the most widely used roofing materials across coastal and peninsular South India, prized for their thermal comfort and traditional character. But the same feature that gives a Mangalore tile roof its distinctive look — hundreds of individual interlocking clay tiles — is also its single biggest waterproofing liability. Every tile-to-tile joint is a potential entry point for water, and a roof with even a handful of neglected joints will eventually show damp patches, fungal growth, or active leakage on the ceiling below, regardless of how sound the tiles themselves are.
Unlike a monolithic RCC slab, a Mangalore tile roof cannot simply be membrane-coated as-is. The joints have to be closed first, or any coating applied over them will crack and fail at exactly those points within a monsoon or two. This procedure fills every joint completely before building a seamless, flexible, weatherproof coating system over the whole surface using ROOFCOAT FLEXI 100.
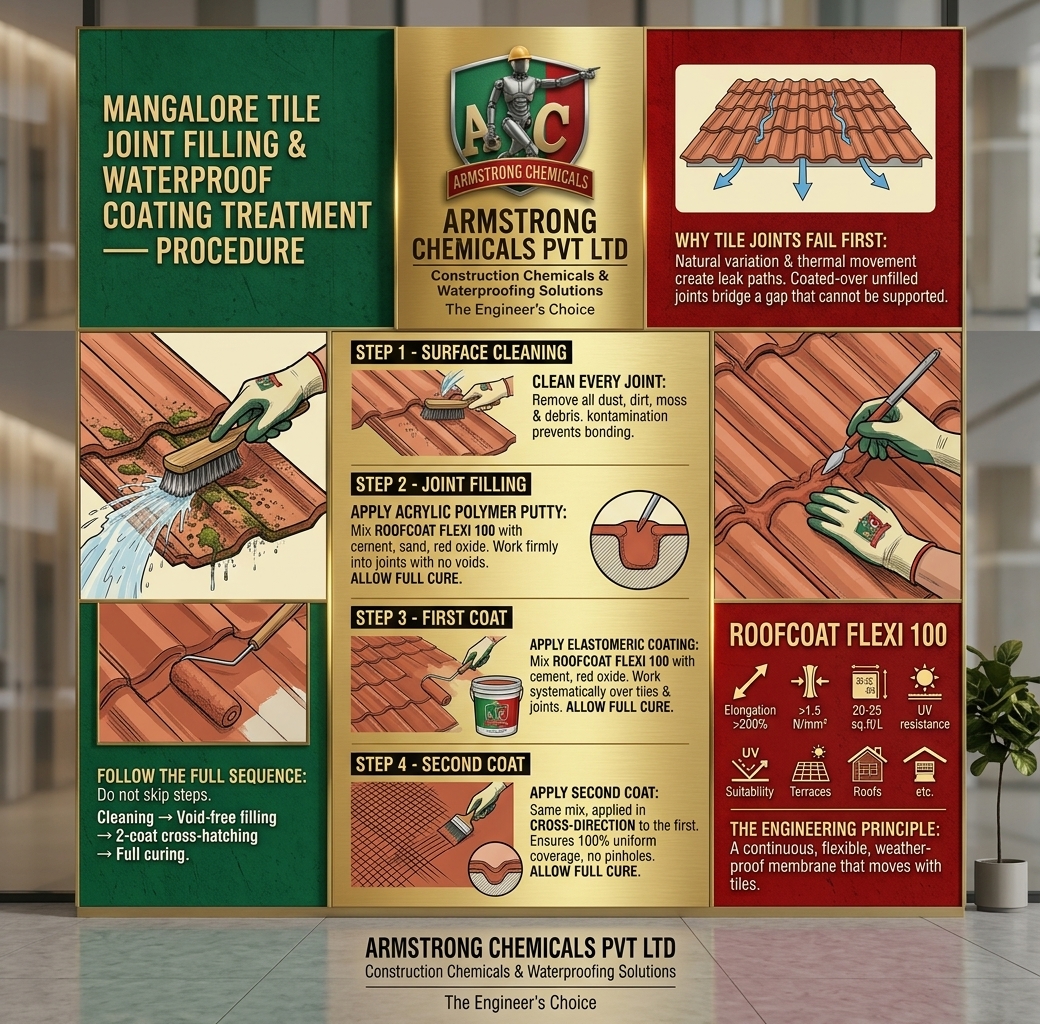
Why Tile Joints Fail First
A Mangalore tile roof is laid with each tile overlapping and interlocking with its neighbours, but the joint lines are never a perfect, continuous seal. Clay tiles have natural dimensional variation, and the joints open further over time from thermal movement, wind uplift, foot traffic during maintenance, and the repeated expansion and contraction caused by direct sun followed by monsoon rain.
Once a joint opens even hairline-fine, capillary action pulls water through it, along the underside of the tile, and into the roof structure. Water can travel some distance before appearing as a ceiling stain, which makes tile-roof leak sources notoriously difficult to trace by eye alone.
This is why coating a Mangalore tile roof without first filling the joints does not work as a shortcut. A coating over an open joint has nothing solid to bond to at that line. It merely bridges an unsupported gap, and that thin film is the first point to crack. Filling the joints gives the later waterproof coating a continuous, supported substrate across the entire roof.
Material Used
ROOFCOAT FLEXI 100 is Armstrong's acrylic polymer-modified cementitious waterproof coating. It is used in two formulations across this procedure: first as a putty for joint filling, then as the liquid component of the surface coating.
| Property | Current specification |
|---|---|
| Type | Single-component acrylic polymer cementitious coating, site-blended with cement and water |
| Elongation | 120%+ |
| Tensile strength | Above 1.5 N/mm² |
| Coverage | 20–30 sq.ft per litre for 2 coats |
| Interval between coats | 24 hours |
| UV resistance | Excellent |
| Suitability | Terraces, roofs, bathrooms, water tanks and podiums |
Its elongation makes it suitable for tile roofs, where the joint-filled and coated surface must move fractionally with the tiles under thermal and structural stress without cracking. Cement, fine sand and red oxide are added on site as specified below — cement and sand for body and mechanical bond, and red oxide for the traditional terracotta tone.
The Four-Step Treatment Procedure
Step 1 — Surface cleaning.
Clean every tile joint and the full roof surface before any material is applied. Remove dust, dirt, moss, lichen and loose debris from the tile surface and, most importantly, from inside the joints. A contaminated joint prevents the putty from bonding to the tile edges. On older roofs, use a thorough dry sweep followed by individual brushing of every joint line, where loose matter can compact over years of exposure.
Step 2 — Joint filling.
Mix ROOFCOAT FLEXI 100 with cement, fine sand and red oxide into an acrylic polymer putty. Fill every Mangalore tile joint completely, working the putty firmly into each joint with a pointing tool or putty knife so no void remains along its length or depth. A joint that appears filled at the surface but contains an air pocket underneath can still pass water.
Allow the filled joints to cure fully before coating. This lets the polymer develop its bond and flexibility; coating too early can disturb or thin the fill at the joint lines.
Step 3 — First coat.
Mix ROOFCOAT FLEXI 100 with cement and red oxide, then apply the first coat across the entire roof — tiles and filled joints together, not only the joint lines. Apply by brush or roller in a consistent film, working ridge-to-eave or in a fixed grid so no section is missed.
Allow 24 hours between coats. Applying the second coat over an under-cured first coat can drag, thin or tear the base film and create early failure points.
Step 4 — Second coat.
Apply a second coat of the same ROOFCOAT FLEXI 100, cement and red oxide mix perpendicular to the first. If the first coat ran ridge-to-eave, apply the second across the roof. This cross-direction method covers pinholes, thin patches or minor inconsistencies in the first coat, leaving no shared weak point.
Allow the second coat to cure fully before exposing the roof to water or foot traffic. Premature monsoon rain or maintenance traffic can compromise the membrane even when its surface appears dry.
The Engineering Principle Behind the Sequence
- Clean first: no putty or coating bonds reliably to a contaminated substrate.
- Fill every joint without voids: the joints, not the tile bodies, are where water enters.
- Cure the putty: an uncured fill cannot develop the bond and flexibility needed to move with the roof.
- Cross-apply two coats: the second direction covers thin points left by the first pass.
- Wait for full cure: monsoon-ready is not the same as touch-dry.
Do not treat any of the four steps as optional. Followed in full and in sequence, the procedure creates a seamless, flexible, UV- and weather-resistant surface that moves with the tiles rather than fighting them.
Need a site-specific tile-roof assessment?
Armstrong's technical team can assess damaged tiles, joint condition, roof movement and exposure before recommending the treatment quantities and application sequence.
Frequently asked questions
© 2026 Armstrong Chemicals Pvt Ltd. All rights reserved.